

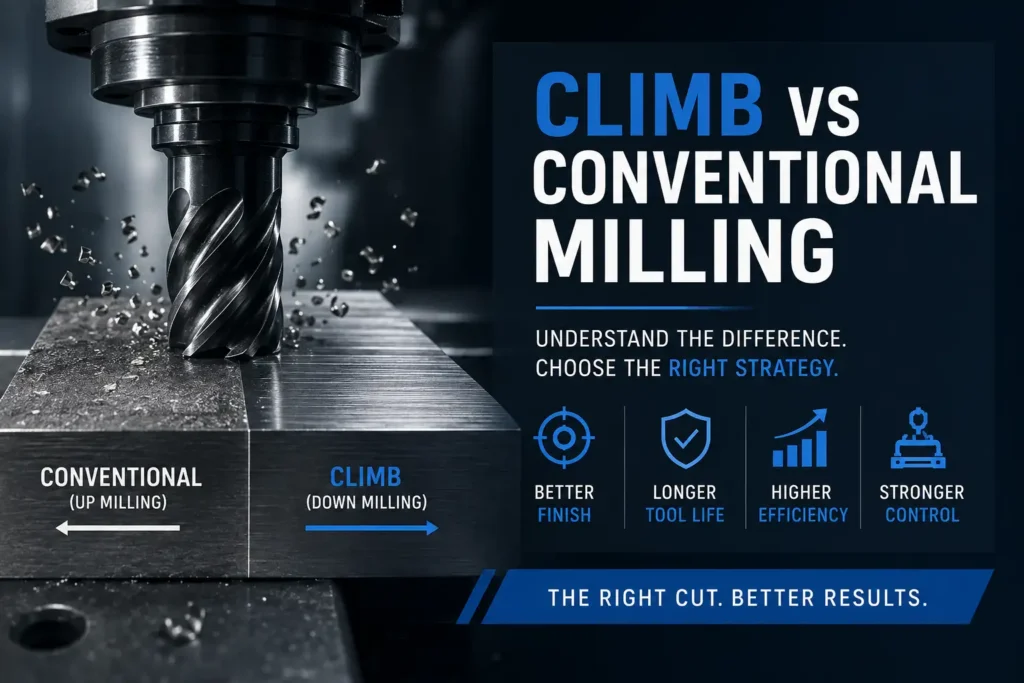
Climb milling and conventional milling are two feed strategies for the same rotating cutter. The difference is the relationship between cutter rotation and table (or tool) feed. That relationship changes chip thickness through the cut, the direction of cutting force, heat at the edge, surface finish, and whether the machine’s backlash can pull the work into the cutter.
Neither method is universally better. The useful question is which chip and force pattern the setup can support.
What the Two Methods Are
In conventional milling (also called up milling), the cutter rotates against the feed. Each tooth meets the work at nearly zero chip thickness and exits at maximum thickness.
In climb milling (also called down milling), the cutter rotates with the feed. Each tooth enters at maximum chip thickness and exits at nearly zero.
On a typical clockwise end mill, conventional milling feeds so the teeth push into the material against the motion. Climb milling feeds so the teeth come down onto the material and pull chips behind the cutter.
How Chip Thickness Changes the Cut
The chip-thickness profile is the mechanism behind most of the shop-floor differences.
Conventional milling starts with rubbing. The edge has to plow into the surface before a chip forms. That rubbing raises heat at the tool, work-hardens some alloys at the surface, and can leave a torn or burnished finish. The thick chip at exit then dumps heat and load onto the edge as it leaves.
Climb milling starts with a shear. The tooth takes a thick chip immediately, then the load falls as the tooth exits. Chips are thrown behind the cutter instead of ahead of it, so the next tooth is less likely to recut swarf. Heat at the edge is usually lower, and the exit is cleaner, which is why climb cuts often leave a better wall and fewer exit burrs.
The same mechanism explains tool life on carbide: rubbing and recutting wear an edge faster than a clean thick-to-thin shear, provided the machine does not snatch the work.
Cutting Forces and Workholding
Force direction follows the chip.
In climb milling, the cutter tends to pull the work in the feed direction and, in many face and slot cuts, press the part toward the table. That can help hold thin floors down. It also means a loose clamp or a sloppy axis can let the part jump into the cutter.
In conventional milling, the cutter tends to push the work away from the tool and can lift the part off the table. Clamps must resist that lift. Deflection of a long end mill often runs more nearly along the cut, which some finish passes use when a wall must stay straight despite tool spring.
Workholding is therefore part of the strategy, not a separate fixture problem. Climb milling needs a rigid machine and a clamp that will not let the part follow the tooth. Conventional milling needs clamps that resist lift and a feed that can live with more rubbing.
Machine Backlash
Climb milling is unsafe on a machine with significant backlash in the feed axis. When the tooth grabs a thick chip, lost motion in the screw or ways lets the table lurch. The cutter then takes a sudden heavy cut.
Modern CNC machines with ball screws, preload, and backlash compensation are built for climb milling. Older manual mills, worn machines, and some light routers are not. On those machines, conventional milling remains the controlled choice even when the finish is worse.
If the axis can be felt to “take up” when reversing direction, do not climb-mill heavy cuts on that axis.
Surface Finish, Tool Life, and Heat
On a rigid CNC with a sharp carbide tool, climb milling usually gives:
- better wall and floor finish
- less recutting of chips
- longer edge life
- lower power for the same chip load
Conventional milling usually gives:
- more rubbing at entry
- more heat in the tool
- a rougher or more smeared finish
- shorter life on carbide in the same material
Those outcomes reverse when the setup is wrong. A light machine climb-milling a heavy radial engagement will chatter or grab. A gummy material climb-milled with too light a chip will still rub. Strategy does not replace chip thickness, rigidity, or a sound tool path.
When Conventional Milling Is the Better Choice
Use conventional milling when the first contact is a hard, abrasive, or uneven skin: hot-rolled scale, sand-cast skin, flame-cut edge, or a heavily work-hardened surface. The thin-to-thick entry lets the tooth get under the skin instead of slamming a thick chip into scale.
Use it on worn or manual machines, on setups with doubtful clamp security, and when a long tool must not be pulled sideways into a finished wall. Some programmers still conventional-mill a light finishing pass when tool deflection in climb would taper the wall.
Use climb milling for most CNC roughing and finishing in aluminum, pre-machined steel, and other uniform stock, on machines with tight axes, when the radial width of cut is well controlled.
A common shop pattern is conventional for the first pass through scale, then climb for the rest of the stock.
Selection Rules
- If the machine has backlash you can feel, conventional milling is the default.
- If the stock has scale or a cast skin, start conventional.
- If the machine is rigid and the stock is clean, climb milling is the default for carbide.
- Keep radial engagement and chip thickness high enough that climb milling actually shears; a tiny width of cut with a tiny feed still rubs.
- Treat thin walls and tall tools as force problems: choose the direction that pushes deflection where the drawing can tolerate it.
- Do not mix the names in CAM. Confirm whether the toolpath is climb or conventional on the actual cutter rotation and feed direction, not only on the software label.
Climb vs conventional milling is a feed-direction decision. Match the chip and the force to the machine, the skin on the part, and the feature that has to stay in tolerance.