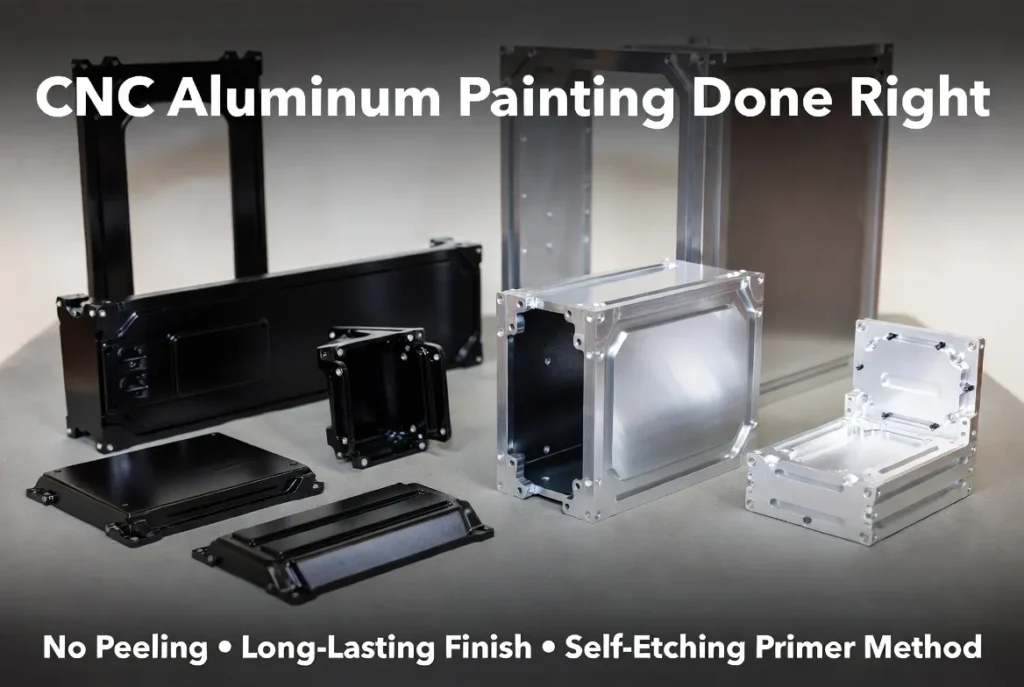
CNC-machined aluminum parts offer excellent strength-to-weight ratio and a premium look, but painting them often results in frustrating peeling, chipping, or blistering. The root cause is aluminum’s rapid-forming oxide layer, which repels standard paint, combined with machining residues like cutting fluids and oils.
This comprehensive 2026 guide walks you through a proven process using self-etching primer and proper surface preparation. Follow these steps to achieve professional, long-lasting paint adhesion on CNC aluminum enclosures, brackets, prototypes, panels, and custom parts.
Why Painting CNC Aluminum Requires Special Techniques
Unlike steel or other metals, bare aluminum develops a thin, stable oxide film almost instantly. This smooth layer prevents ordinary primers from bonding. CNC machining adds another challenge with residual coolants, aluminum dust, and fingerprints that create weak spots in the finish.
The winning combination: thorough cleaning, mechanical abrasion, optional chemical etching, and a quality self-etching primer that chemically bonds to the aluminum while providing an ideal base for topcoats.
Materials and Tools Needed for Professional Results
Cleaning:
- Aluminum-safe degreaser or strong dish soap
- Hot water
- Nylon brush or stainless steel wool (avoid carbon steel)
- Acetone or 99% isopropyl alcohol
- Lint-free cloths and nitrile gloves
Preparation:
- 180–320 grit sandpaper or sanding blocks
- Phosphoric acid etcher (optional for maximum adhesion)
- Self-etching primer (Rust-Oleum, SEM, or similar zinc-phosphate formulas)
Painting:
- Acrylic, polyurethane, or automotive-grade metal paint
- Optional clear coat for UV and scratch protection
- Spray gun or high-quality spray cans
- Tack cloths and painter’s tape
Work in a well-ventilated area with proper PPE (respirator, goggles, gloves).
Step-by-Step Guide: Painting CNC Aluminum for Durable Finish
Step 1: Thorough Cleaning Wash the part in hot soapy water, scrubbing all surfaces, threads, and pockets for 5–10 minutes. Rinse completely. Wipe with acetone or isopropyl alcohol while wearing gloves to remove every trace of oil and residue. This eliminates the majority of adhesion failures.
Step 2: Mechanical Sanding Sand the surface evenly with 320-grit paper (or start with 180–220 grit for heavier oxide). Continue until the shiny aluminum becomes uniformly matte. Remove all dust with compressed air or a tack cloth. The micro-roughness created here dramatically improves bonding.
Step 3: Optional Phosphoric Acid Etching Apply or immerse in diluted phosphoric acid etcher per instructions (usually 3–10 minutes). This dissolves remaining oxide and forms a phosphate conversion layer. Rinse thoroughly with clean water and dry with alcohol. Always use PPE.
Step 4: Apply Self-Etching Primer Shake the can well. Spray 2–3 thin, wet-on-wet coats from 12–16 inches away. Allow 1–2 minutes between coats. The acid in the primer lightly etches the aluminum and deposits zinc phosphate for superior chemical adhesion. Dry according to the product label (typically 15–30 minutes to touch, several hours before topcoating). Lightly sand with 400-grit if needed and remove dust.
Step 5: Apply Topcoat Spray 2–3 thin coats of compatible acrylic or polyurethane paint, respecting flash times between layers. For high-end CNC parts, automotive enamels provide the best color retention and durability. Add a clear coat for extra gloss and protection if desired.
Step 6: Curing and Quality Check Allow 24–48 hours minimum (ideally 7 days) for full cure. Perform a cross-hatch adhesion test—excellent results show minimal or no paint removal.
Troubleshooting Common CNC Aluminum Painting Issues
| Issue | Likely Cause | Fix / Prevention |
| Peeling or flaking | Inadequate cleaning or no etch primer | Deep degrease + self-etching primer |
| Blisters / bubbles | Trapped moisture or oils | Full drying and alcohol wipe before priming |
| Runs or uneven finish | Heavy coats or incorrect distance | Thin coats, consistent 12–16″ spray distance |
| Early scratches | Insufficient curing | Wait full recommended cure time |
| UV fading | Non-weatherproof topcoat | Choose automotive-grade paint + UV clear coat |
Expert Tips for CNC Shops and Makers
- For production volumes, consider professional conversion coating (Alodine-style) before painting.
- Maintain shop temperature 60–85°F (15–30°C) and low humidity during spraying.
- Test your specific alloy (e.g., 6061 vs 7075) on scrap first.
- For show-quality mirror finishes, add a high-build surfacer after the self-etch primer and wet-sand smooth.
Mastering this process transforms CNC aluminum parts into robust, attractive components that hold up in demanding environments.
Have a specific CNC aluminum painting project? Drop your alloy type, part application, or environment in the comments for personalized advice.
FAQ
Q: Can I paint CNC aluminum without self-etching primer?
A: Technically yes, but adhesion is poor and peeling is common. Self-etching primer is the recommended standard for reliable, long-term results on aluminum.
Q: What is the best primer for painting machined aluminum?
A: Self-etching primers containing zinc phosphate, such as Rust-Oleum or SEM formulas, deliver the strongest bond by chemically etching the surface.
Q: How long will properly painted CNC aluminum last?
A: With correct preparation, indoor finishes often last 5–10+ years, while outdoor exposure can achieve 3–7 years depending on UV and weather conditions.
Q: Do I have to sand CNC aluminum before painting?
A: Yes. Sanding removes the smooth oxide layer and creates essential mechanical “tooth” for the primer to grip.
Q: Is phosphoric acid safe to use on aluminum parts?
A: Yes, when properly diluted and used according to instructions. It effectively prepares the surface—always wear protective gear and rinse well afterward.
Q: What type of paint works best on CNC aluminum?
A: High-quality acrylic or polyurethane paints made for metal. Automotive-grade enamels and UV-resistant clear coats provide superior durability and appearance.